Create an “Instagrammable” Space
Event guests don’t just attend anymore; they document. A 2024 survey by Sprout Social found that 79% of attendees share event photos on social media the same day, and organizers who build photo-ready environments see that content spread far beyond the room. The pressure’s never been higher.
This article breaks down exactly how event organizers create “Instagrammable” spaces in minutes, the props and decor tools that do the heavy lifting, and why the fastest setups often make the most lasting impressions online.
The Fastest Visual Tools Event Organizers Actually Rely On
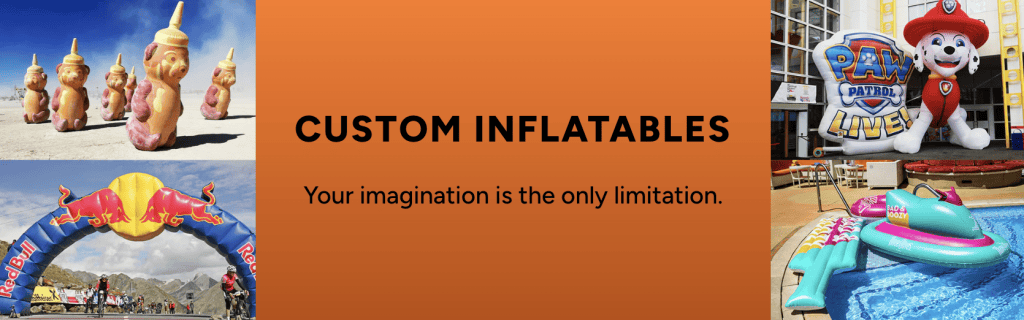
Speed matters at events, especially when the setup needs to look polished before guests arrive. With the option to make your own blow-up inflatables, organizers can use shapes that fit the event concept, whether that means a branded arch, oversized logo, product replica, mascot, or themed photo prop. Since inflatables can be designed around specific colors, sizes, and visual details, they help create a clear focal point without relying on heavy staging or a long installation process.
Oversized Inflatables as Instant Focal Points
A single large inflatable can define an entire corner of a venue, think a 6-foot branded flamingo at a brand launch, or a giant logo-shaped float at a product reveal. Guests naturally gravitate toward them. The scale reads beautifully on camera. They pack down small, travel easily, and require no tools to set up.
Modular Backdrops That Pack Flat
Foam tile walls, acrylic panels, and fabric stretch frames are workhorses in fast event design. They arrive flat, assemble in minutes, and create clean, color-blocked backgrounds that photograph well even in mixed venue lighting. Many organizers stock two or three colorways so the same backdrop system works across different event themes.
Strategic Lighting in Under 10 Minutes
A warm LED strip behind a floral wall or a neon sign mounted on a stand changes a space completely; battery-powered options mean no electrician, no permits, and no cable runs across the floor. Clip-on spots and LED uplights placed at the base of props create depth that flat room lighting simply can’t achieve.
Design Principles Behind Spaces That Go Viral
Not every decorated space gets shared. The ones that spread? They’re built around a few predictable principles. And understanding them lets you plan smarter from the start.
Color Contrast and the “One Clear Subject” Rule
The most shared event photos follow the same visual logic as good portrait photography: one clear subject against a contrasting background. A white floral arch against dark navy. A neon sign against exposed brick. Your guests become the subject; the decor becomes the frame. Pick one dominant color and one accent; more than two competing colors in a single shot creates visual noise that audiences scroll right past.
Prop Scale and Its Effect on Shareability
Scale surprises people. A life-size prop at eye level is expected; a prop that towers above your guests creates a moment worth capturing. So organizers who go one size larger than feels “normal” find their setups get tagged far more often. The trick? Proportionality. The oversized element should still feel intentional, not accidental.
Built-In Framing for Natural Shot Composition
A floral arch, a geometric frame, or even two tall balloon columns flanking a step-and-repeat all serve the same purpose: they tell guests exactly where to stand and give the photo a border. Built-in framing removes the guesswork; guests stop, step inside the frame, and shoot. The result is a consistent, shareable image every single time.
How Organizers Execute Fast Setups Without Losing Quality
Here’s the thing: planning is what makes a five-minute setup possible on event day. The actual speed comes from decisions made weeks earlier.
The “Photo Zone First” Planning Framework
Experienced organizers treat the photo zone as the first element placed, not an afterthought. They identify the highest-traffic corner of the venue, measure the space, and build the photo zone around those exact dimensions; everything else fills in around it. This approach means the most important visual asset is never rushed or squeezed into a corner that doesn’t work.
Pre-Built Kits and Staging Checklists
The fastest setups come from pre-built kits: everything for a photo zone packed into one rolling case, labeled and staged in install order. Inflatables in bag one, lighting rig in bag two, backdrop panels in bag three. A simple checklist keeps the crew from improvising on-site. That’s where time (and quality) gets lost.
Testing Before Guests Arrive
But organizers who photograph the setup themselves before doors open catch problems fast. A shadow falling across the wrong spot. A backdrop seam that shows up in photos but not in person. Five minutes of test shots and one round of small adjustments save hours of unusable guest content. Take the shot from the exact angle guests will use, check the phone screen, and move anything that distracts.
Conclusion
Event organizers create “Instagrammable” spaces in minutes by front-loading their decisions: choosing props with high visual impact, designing around contrast and scale, and pre-staging every element before the event begins. The fastest setups aren’t improvised; they’re planned obsessively, packed precisely, and executed in the time it takes to inflate a pool float. Start with the photo zone, commit to one bold visual anchor, and the rest of the space builds itself.