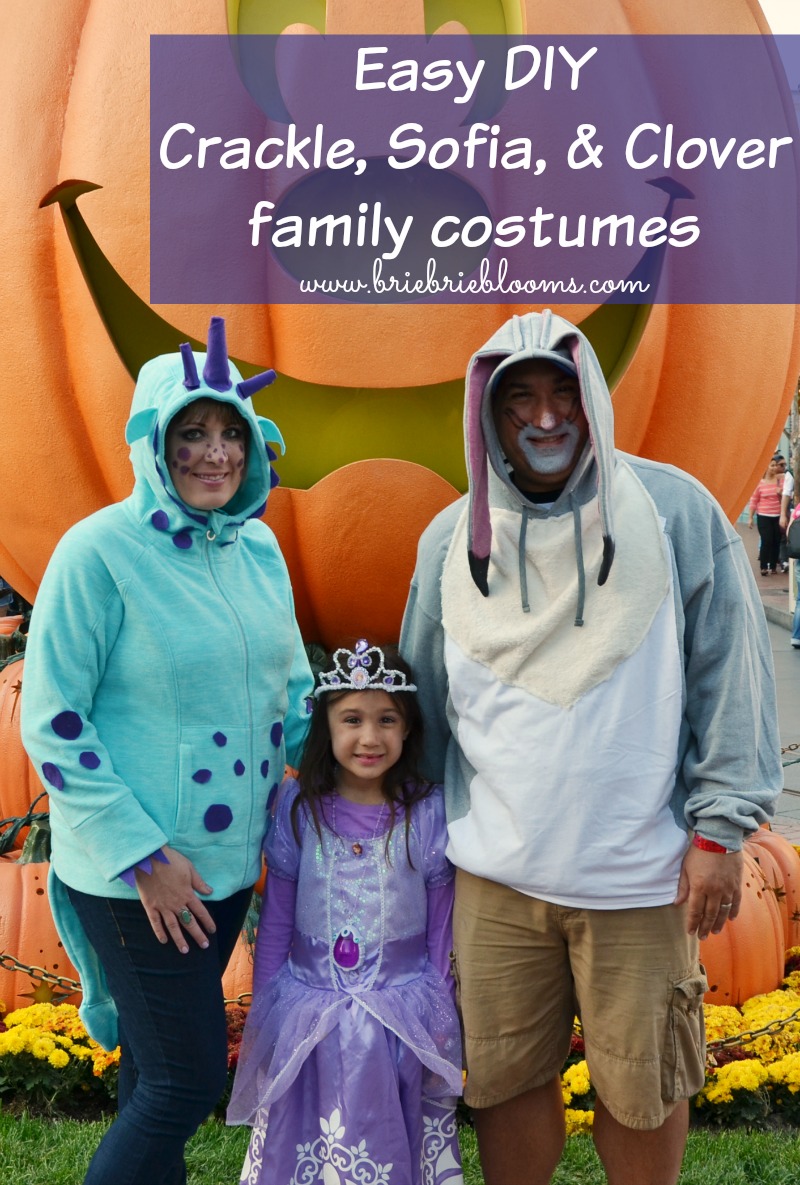
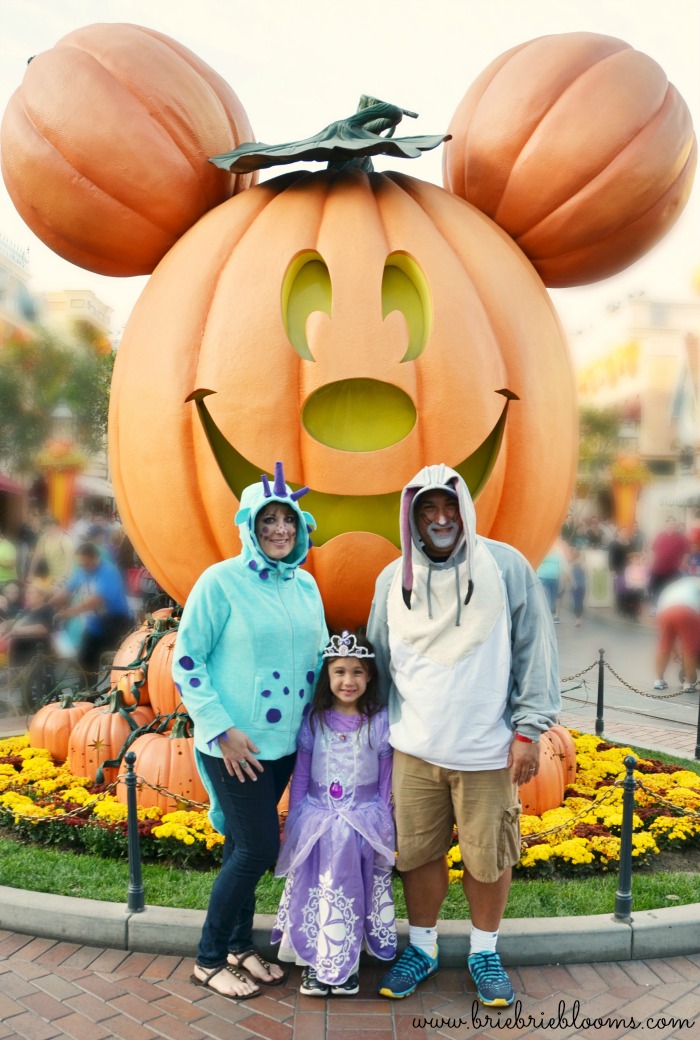
This Halloween has been full of costume parties so we have been busy getting creative. We recently went to Disneyland to celebrate at Mickey’s Halloween Party. It wasn’t until the very last minute my daughter decided she would like to wear her Princess Sofia dress to the event. She suggested my husband and I wear matching costumes. We quickly started designing our Crackle, Sofia, and Clover costumes. The easy DIY project only took a couple of hours to complete. I used a sewing machine for a few parts but the costumes can be easily replicated with fabric glue or stitched by hand.
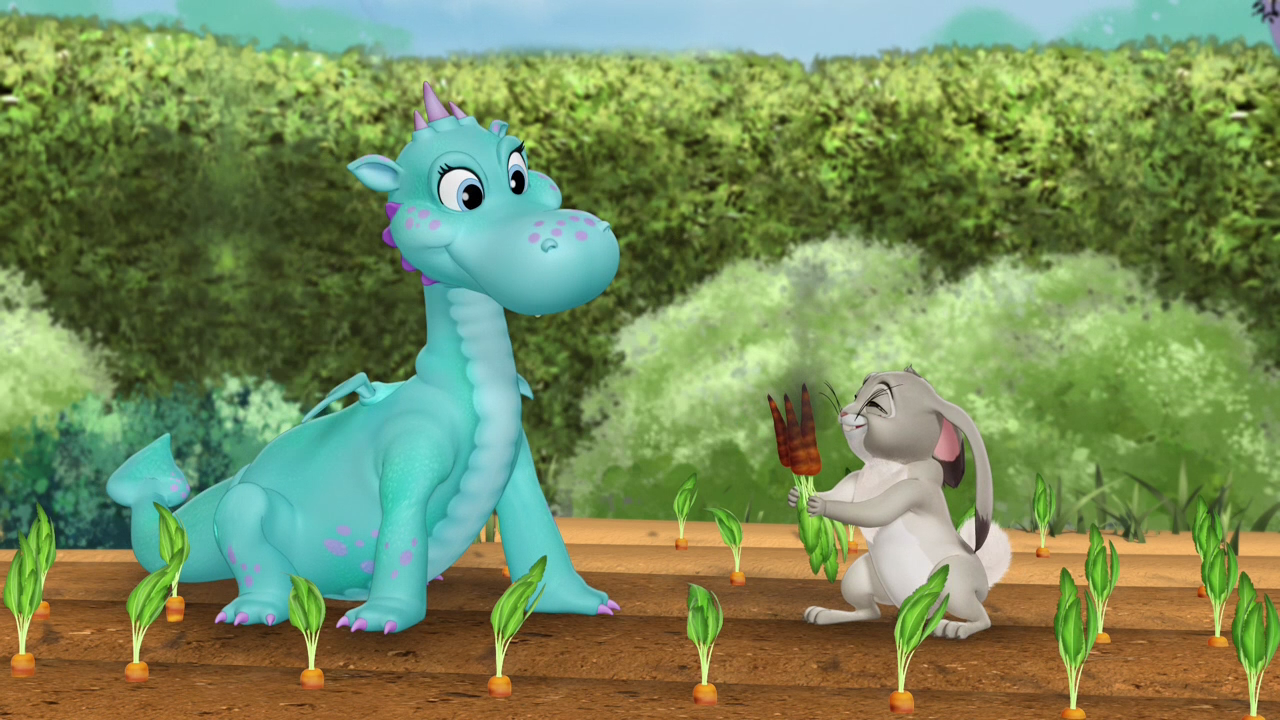
First I found a picture of Crackle and Clover to use as a guide for making perfect costumes.
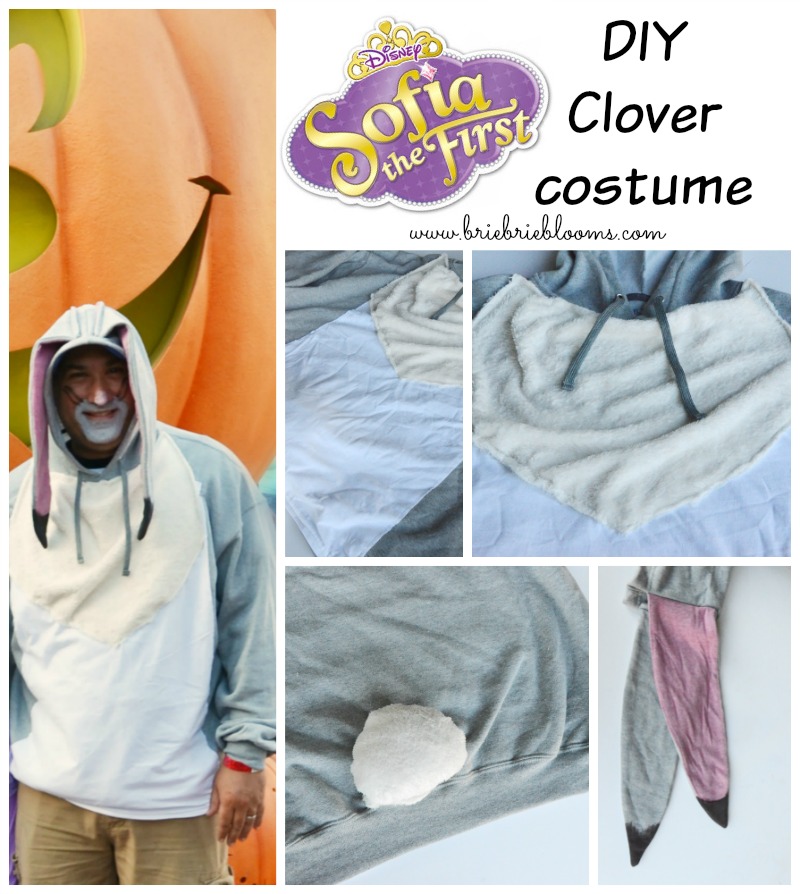
DIY Clover costume tutorial
Supplies:
- grey hooded sweatshirt
- white t-shirt or fabric
- off-white fuzzy fabric (I used a blanket)
- grey sweatshirt fabric or second small sweatshirt (for ears)
- light pink fabric (I used an old t-shirt)
- black permanent marker
Tutorial:
1) Cut rectangle from white t-shirt to fit front of sweatshirt. Stitch edges to secure to shirt.
2) Cut large V shape from off white fuzzy fabric to fit the neck and chest of the sweatshirt. Stitch edges to secure to shirt.
3) Cut large circle from fuzzy fabric and loosely stitch to the bottom edge of the back of the sweatshirt to make the tail. Stuff with fabric and stitch around edges to secure.
4) Cut two matching pieces from the extra sweatshirt to make the ears. Cut the same size pieces from the pink fabric. Layer a grey ear and pink ear pieces together with the right sides facing each other. Stitch around the edges but avoid stitching along the top then turn right side out. Repeat to make the other ear. Color the bottom tips of each ear with black marker. Secure ears to top of hood by stitching along the top edge.
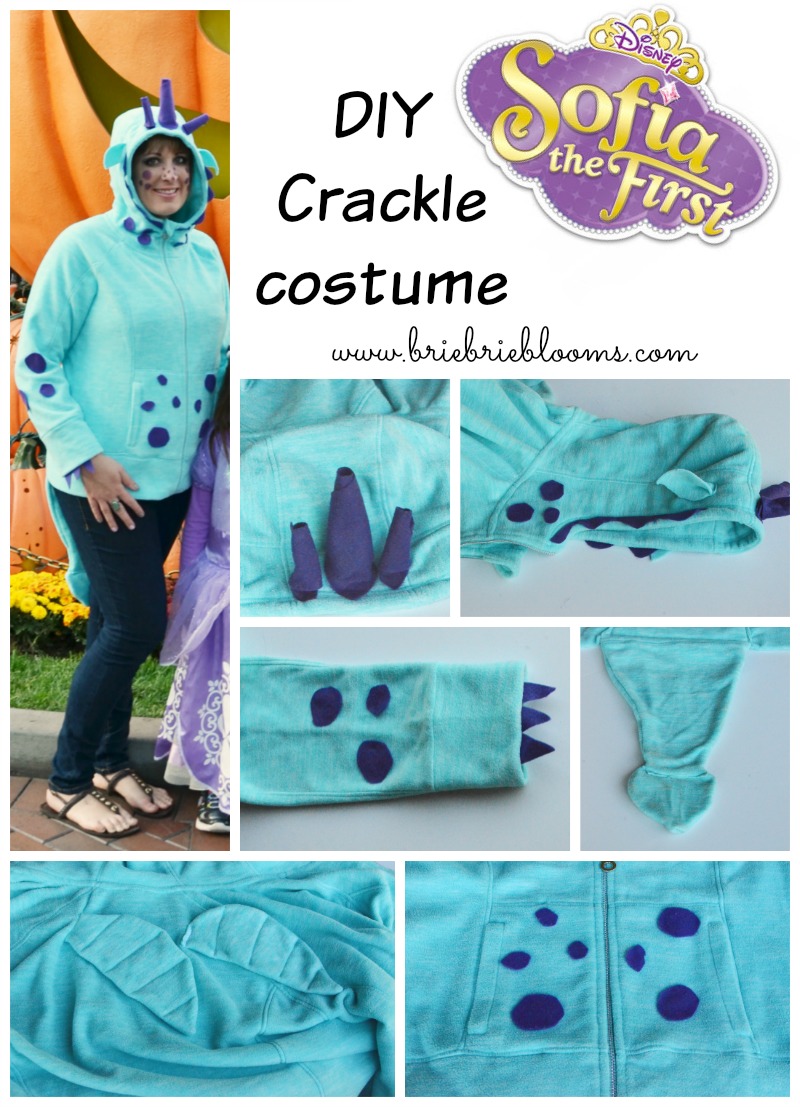
DIY Crackle costume tutorial
Supplies:
- 2 matching teal hoodies or hooded sweatshirts (hoodies shown are Kenneth Cole Unlisted from Sam’s Club)
- purple felt
- hot glue and glue gun
Tutorial:
1) Roll three pieces of purple felt to make the horns. Secure edges and attach to the top of hood with hot glue.
2) Cut felt strip with straight edge and triangle shapes to line the face of the hood. Attach to edge of hood with hot glue.
3) Cut different size felt circles and embellish top of hood, arms, and tummy. Attach the felt pieces to jacket with hot glue.
4) Cut short felt strip with straight edge and triangle shapes to line top of inner sleeve. Attach to jacket sleeve with hot glue. Use second hoodie for fabric to create ears, tail, and wings.
Use the second hoodie to make the ears, tail, and wings.
5) Create the ears by cutting two ovals out of teal fabric then stitching corners to top of hood.
6) To make the tail, cut two long pieces and two heart shapes from the teal fabric. Use pins to secure the heart shapes to the bottom of each longer tail piece. Stitch the two sides together (wrong side facing out) making sure not to stitch along the top. Turn right side out and stitch to the back edge of jacket.
7) Cut four pieces of teal fabric to make the wings. Stitch them right side together then turn them right side out. Embellish the wings by stitching vertical lines into the wings. Then stitch the ends to the back of the jacket.
As expected, our family had so much fun watching parades, trick or treating, and riding attractions at Mickey’s Halloween Party!
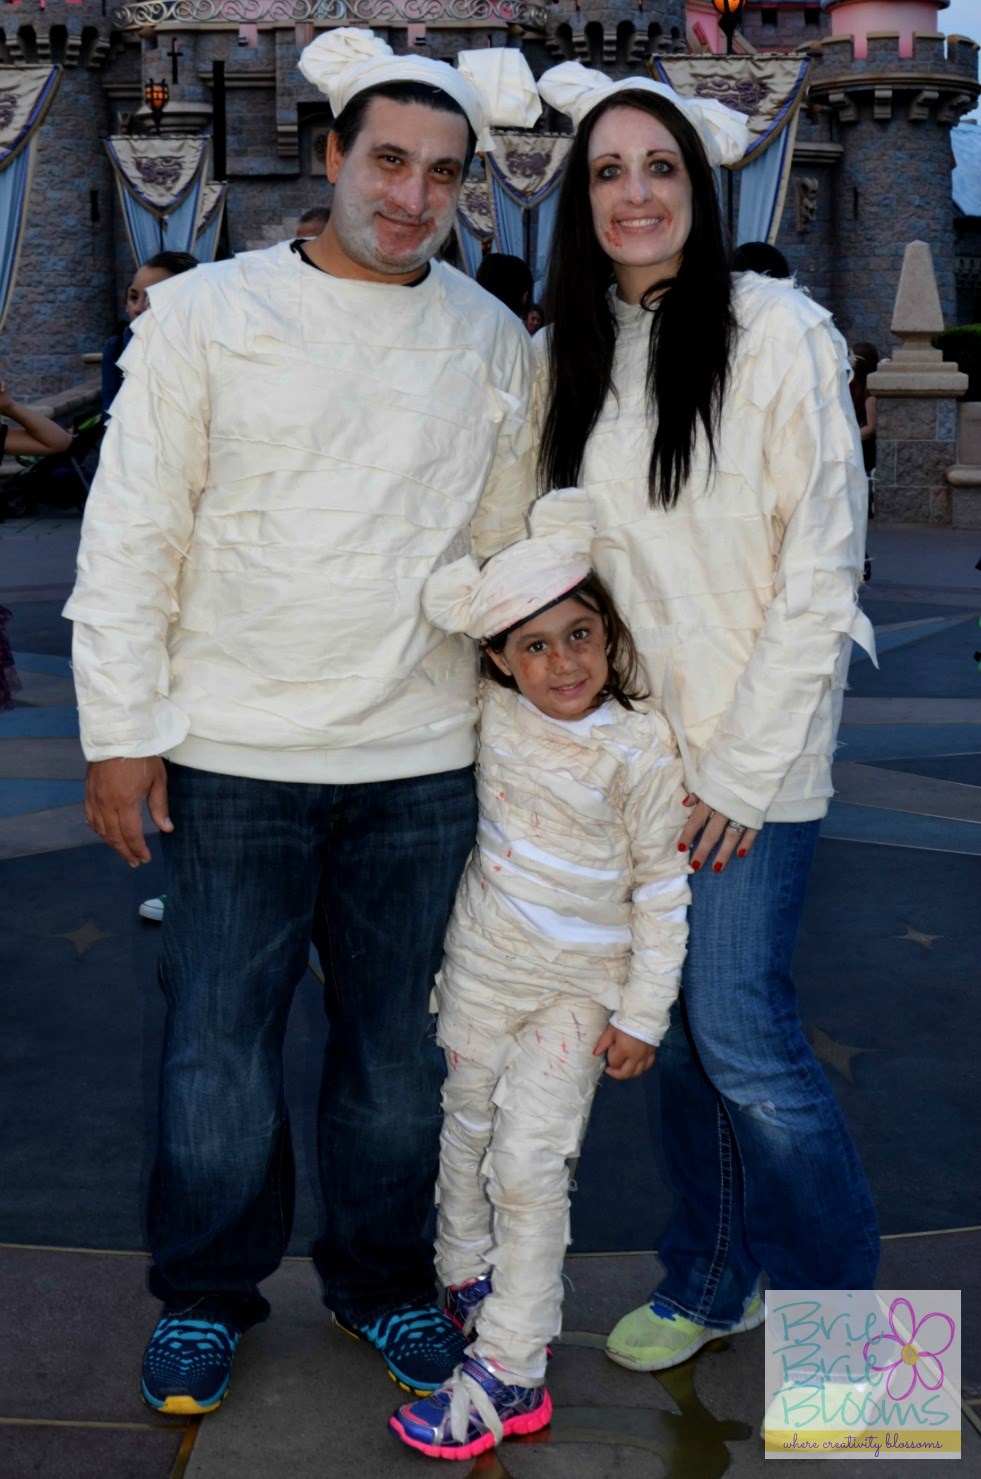
Last year we dressed up like Mickey Mummies and enjoyed the party. The easy DIY Disney mummy costume tutorial was so quick I made two of the costumes while we drove to Disneyland from Arizona!
What is your most favorite Disney family costume?

Sooooooooo cute!!!! I love the way this turned out!!
Thanks Sara! They were so much fun in Disneyland!
Great costumes! Going to Disneyland in costume is always more fun!