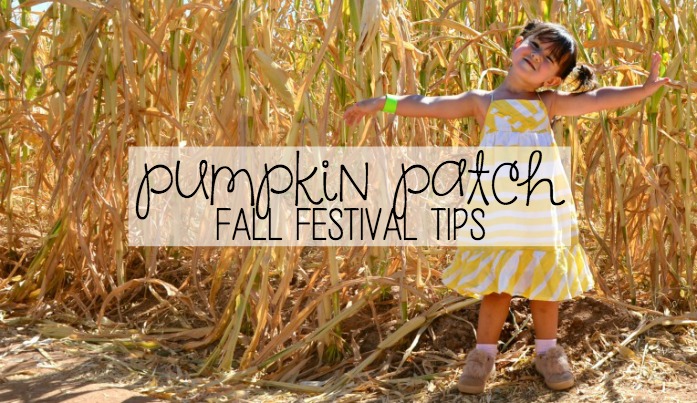
Category Archives: Outdoor

Community Fishing Clinic {Arizona}

We have a lake in our community where homeowners are allowed to fish.  The lake has a strict catch and release policy so there is always plenty of fish.  As the weather is getting warmer we are starting to see more and more residents enjoying the lake.  Last weekend our community held a fishing clinic to teach residents how to properly catch and release fish.

Brie Brie Blooms, Community Fishing Clinic (9)

Jeff Jenkins of Arizona Lake and Pond coordinated the entire event for our community and made sure we all had a great time with our neighbors. 

Cabela’s provided fishing poles so everyone could have the opportunity to learn to fish.

Brie Brie Blooms, Community Fishing Clinic (3)

Arizona Lake and Pond donated bait and taught us how to bait our hooks.  

Brie Brie Blooms, Community Fishing Clinic (5)

Like many other children at the event, my daughter was very excited to fish for the first time!

Brie Brie Blooms, Community Fishing Clinic (2)

All the kids were having fun.

Brie Brie Blooms, Community Fishing Clinic (12)

The event was a great opportunity for families to spend time together and meet their neighbors.

Brie Brie Blooms, Community Fishing Clinic (6)

Brie Brie Blooms, Community Fishing Clinic

The Gilbert Police Department brought a classic car to the event.  

Brie Brie Blooms, Community Fishing Clinic (4)

They also handed out badge stickers to all the children.

Brie Brie Blooms, Community Fishing Clinic (7)

Thanks to ELS Maintenance Inc., we all had lunch at the lake.

Brie Brie Blooms, Community Fishing Clinic (8)

They brought a grill, cooked hamburgers and hot dogs, and served us!

Brie Brie Blooms, Community Fishing Event

Brown Community Management provided chips and water for our lunch.

Although we didn’t see too many fish caught, I know there were a few residents that were excited about big catches.

Brie Brie Blooms, Community Fishing Clinic (11)

Our community was able to enjoy the perfect weather, fish, and have lunch together. 

Brie Brie Blooms, Community Fishing Clinic (10)

Remember to catch and release if you’re out fishing at our lake!

Tomato Cage Holiday Trees

This weekend I decided to work on a quick holiday project that had been on my to do list for a few years.  Driving by my home to look at lights, you would never know I made these holiday trees with wire tomato cages!

Supplies

  • Wire tomato cages (you can find these in the garden section of most stores; I purchased mine from Lowe’s)
  • String of lights (I used holiday lights found in the garage)
  • Optional: shatter proof ornaments (I used a few leftovers from our holiday decorations)

1) Wrap the top of the tomato cage with wire to hold the top closed.  

If you don’t have wire, get creative;  you could easily do this with string or a rubber band.

2) Wrap the tomato cage with lights and add ornaments.  

I started wrapping the lights from the bottom to help with spacing.  I didn’t want to wrap too tightly and then end up with out enough lights at the bottom.

I secured the shatter proof ornaments by wrapping the hanging wire around the tomato cage. 

3) Take your trees outside and plug in the lights.

My small display has three trees.  Each tree used their own strand of lights and were plugged into each other.  You might want to secure the trees in the ground with small metal stakes.  Living in Arizona with extremely mild winter weather I didn’t do anything to permanently secure the trees.  I just buried the base level of the tomato cage under our gravel in the yard. 

 4) Wait for the sun to go down and go out to admire your trees!

This project cost less than 10 dollars!  I love frugal projects that turn out exactly as expected!

I’m linking this post here.

Outdoor Playhouse Makeover featuring Royal Design Studio Stencil

Attending the SNAP conference earlier this year was an amazing experience.  I knew well in advance I would be attending the workshop “Get Your Stencil On!” presented by Royal Design Studio.  Their stencils are absolutely amazing and I’ve seen so many gorgeous projects from talented bloggers.  Prior to SNAP I was extremely intimidated by the idea of stenciling anything in my home.  I had a horrible experience previously and I vowed to either 1) never stencil again, or 2) learn how to do it correctly.  I am so grateful for the wonderful hands on presentation at SNAP because it bolstered my confidence and put me back to thinking I was capable of using a stencil.  Royal Design Studio generously gave every conference attendee a stencil to keep.  They had so many great options (see their extensive collection here) and I was very excited to bring home the Granada Border stencil.  I had literally hundreds of ideas for my new stencil.  I finally made the decision to use it on my daughter’s outdoor playhouse.

Several Arizona summers caused the playhouse to be in desperate need of restoration.  The sun had completely faded the original color.

Before using a water seal stain on the house I pulled out my stencil to add some pretty details.  I referenced my notes from the conference and looked at a few of the Royal Design Studio online tutorials before I started working with the stencil.  Once I actually started painting, the project went very quickly with no problems.

Supplies:
-Stencil
-Painters Tape
-Paint (Valspar exterior paint used on this project)
-Brush (I used a Shur-Line Classic Paint Edger)

I began by taping the stencil directly onto the playhouse.

I gently placed my edger into the paint and then dabbed off all excess paint with a paper towel.

Applying the paint was easy!

 I used the stencil to paint three sides of the house.

The paint took less than one hour to completely dry.  Next I used Thompson’s Waterproofing Stain to cover the entire playhouse.

The painting was done but the playhouse still needed a few changes.  The wooden door knob needed to be replaced so I took my daughter to Hobby Lobby and let her pick out a fun drawer pull.  She picked a big blue flower for the door.

The benches on the front of the house also needed a splash of color so I covered the seats with outdoor fabric.  The fabric is simply stapled to the benches and can be easily changed later if necessary.

My daughter was most excited about the hummingbird feeder I added to the front.

The window on the back of the house had a perfect space for flowers.

Lastly, I went out to find perfect stepping stones for the house.  Instead of real stones I found rubber stepping stones at Lowe’s.  They were very inexpensive and I love that they are made from recycled tires!

We started with a weathered shack and ended up with a cute playhouse! 


I’m so happy I finally conquered my fear of stencils.  If you’ve been dreaming of a using a stencil in your home, now is the perfect time to start your project! 

I’m so excited to share that Royal Design Studio will be giving away a stencil to one of you very soon.  Be sure to follow along so you don’t miss the giveaway!

I’m linking this post here.