
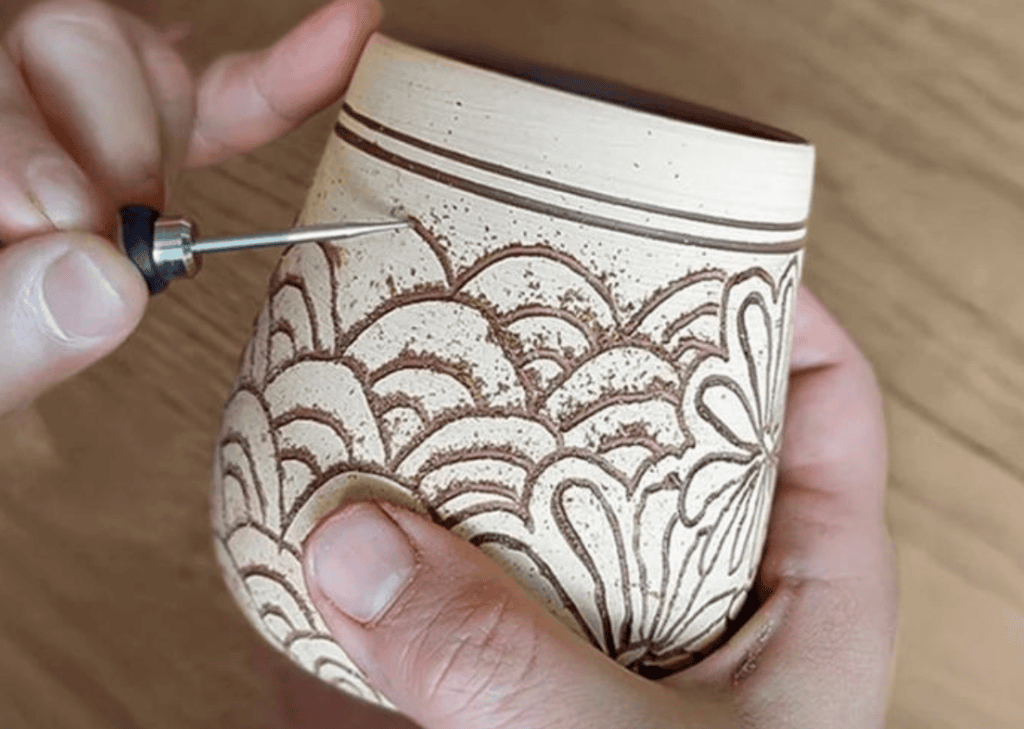
A blank acrylic mug feels like an invitation. Add a name, a date, or a small drawing, and it turns into something a friend will actually keep on a shelf. A hobby engraver used to need a workshop, but that reputation is outdated now. You do not need power tools, dust masks, or years of practice to get a clean result.
This guide walks through the materials, the steps, and the small tricks that make acrylic engraving forgiving for first-timers. You will also learn how to steady your hand and avoid common beginner mistakes.
Why Acrylic Mugs Make Great Engraving Projects
Acrylic sits in a comfortable middle ground between glass and wood for a first engraving project. It scratches with light, consistent pressure, so you get visible lines without fighting the material.
Cost is another reason beginners gravitate toward it. A plain acrylic mug usually costs less than a ceramic one, so mistakes feel low-stakes. If a first attempt goes wrong, you can practice on a second blank without much financial regret.
What to Look for in a Blank Acrylic Mug
- Wall Thickness Matters: Thicker acrylic resists cracking and holds fine detail better than thin, lightweight cups.
- Smooth Surface Finish: A cup with a matte or lightly textured surface hides small errors more easily than a glossy one.
- Flat Engraving Area: A section without curves or handles nearby gives you more control during your first few passes.
Set up your workspace before you buy anything else. A clean table, good lighting, and a damp cloth within reach make the whole process smoother. Clutter around the work area is one of the easiest ways to slip and ruin a clean line.
Find the Right Engraving Tool for Beginners
A rotary engraving pen makes the biggest difference for beginners. These handheld tools spin a small tip that etches the surface, giving you steadier control than a fixed blade. Most beginner pens run on batteries or a plug-in cord, and either option works fine for mug projects.
Resparked designs an engraving pen built specifically for people with no prior experience. The pen stays lightweight, and the grip sits close to the tip, so your hand does not tire during longer sessions. Their craft kits bundle a pen with extra tips and practice material. You can see more at resparked.com.
Practice on a scrap piece before touching your actual mug. Five minutes of test lines on cardboard or an old container will teach you how much pressure the tool actually needs.
Prepare Your Design Before You Start Engraving
A clear plan saves you from second-guessing halfway through a mug. Sketch the design on paper first, and keep the lines simple for a first project. Complicated shading or tiny script tends to blur once it meets acrylic.
Simple Design Ideas for a First Mug
- Initials or a Short Name: A single letter or a first name is easy to trace and hard to mess up.
- Small Line Drawing: A simple heart, star, or mountain outline reads clearly even at a small size.
- Short Date or Word: A birthday, anniversary, or a meaningful word keeps the design personal without extra detail.
Transfer the design onto the mug with a fine-tip marker or a strip of transfer paper before you engrave. This step gives you a guideline to follow and keeps you from freehanding the whole thing from memory.
Step-by-Step Engraving Process for a Clean Result
Secure the mug before you turn on the pen. A rubber mat under the base, or a rolled towel inside a bowl, keeps it from rolling while you work. Hold the pen like a pencil, and let the tip do the work instead of pressing hard.
Move slowly along your design line, and keep the pen at a steady angle. Short, controlled strokes look cleaner than one long dragged line, especially around curves. If a line comes out shallow, wipe away the acrylic dust and go over it again.
Wipe the surface with a soft cloth every so often. Acrylic dust builds up fast, and it hides your progress if you let it collect.
Mistakes happen even with careful hands, and most of them are fixable. A crooked line often blends in once the full design is finished. Resist the urge to fix every small flaw right away. Step back and look at the whole mug before you decide if a correction is worth the risk.
Final Touches and Gift-Ready Presentation
Once the engraving is finished, wash the mug with warm water and mild soap. This removes leftover acrylic dust and any marker lines from your transfer paper. Dry it fully before handling, since a wet surface can smear stray pencil marks into the grooves.
Presentation adds as much impact as the engraving itself. A simple ribbon, a handwritten tag, or a small box turns a homemade mug into a gift that feels intentional. Buyers researching a beginner tool often check reviews first. Resparked holds an “Excellent” rating from 2,493 customer reviews, which gives new engravers a sense of what to expect.
Store your engraving pen somewhere dry once you finish a project, and keep spare tips together in a small case. A little care between projects keeps the tool ready for the next gift idea. That could be a mug, a phone case, or a small keepsake box.
Final Thoughts
A first attempt at engraving rarely looks perfect, and that is fine. Small wobbles in a line often add character rather than ruining the piece. Each mug you make teaches you something for the next one, and the learning curve flattens fast.
Start with a plain acrylic mug, a simple design, and a steady hand, and you already have everything a beginner project needs. This kind of project also works well as a group activity. Friends or family members can each engrave their own mug during one sitting. Save your first attempt too, even if it is imperfect, since it makes a good reminder of where you started.